
Replacing BMW badges is one of the most satisfying exterior upgrades you can do — under 30 minutes, under £20 in tools, and the gloss black de-chrome look changes how the car reads from every angle. But it's also one of the most commonly botched jobs.
Not because it's technically difficult. Because most people skip the steps that protect the paint. A screwdriver under the badge, no heat, no dwell time on the adhesive remover — and you've got swirls in the lacquer or a patch of pulled paint where the tape let go too hard.
This is the exact process KITS UK uses at the West Yorkshire workshop. We've done this on hundreds of builds — here's what actually works.
- Heat the adhesive with a heat gun or hair dryer for 30–45 seconds
- Cut through the adhesive with fishing line — never metal tools
- Apply adhesive remover, allow 60 seconds dwell time, wipe with microfibre
- Clean with isopropyl alcohol — the surface must be spotless
- Dry-fit the new badge and confirm alignment before the backing comes off
- Press firmly for 30–60 seconds — don't wash the car for 24 hours
Tools You'll Need
Watch It First — Then Follow the Steps
This is KITS UK's own step-by-step badge swap guide. Watch it through once before you start — it'll make the written steps below much easier to follow.
Step-by-Step: Removing the Old Badge
Warm the adhesive
Hold the heat gun or hair dryer 10–15cm from the badge and move it continuously across the surface for 30–45 seconds. The panel should feel warm to the touch — not uncomfortable. The adhesive tape behind the badge softens at around 50–60°C.
Do not hold the heat in one spot. Sustained concentrated heat on clearcoat can cause micro-blistering — work in sweeping passes.
Cut through the adhesive with fishing line
Loop fishing line around both hands, slide it behind one end of the badge and work through the adhesive tape with a back-and-forth sawing motion. Move steadily along the badge — don't jerk or pull upward.
- Keep the line as parallel to the panel surface as possible
- If resistance increases, re-heat for another 20 seconds before continuing
- The badge should come away cleanly — if it's fighting you, it needs more heat
Remove adhesive residue
Apply adhesive remover to a microfibre cloth (not directly to the paint) and work it into the residue. Allow 60 seconds dwell time — the remover needs time to break down the adhesive rather than just moving it around. Wipe clean, then check. If any residue remains, repeat rather than scrubbing harder.
Clean with IPA
Wipe the surface with isopropyl alcohol on a clean, fresh microfibre cloth. This removes all adhesive remover residue, finger oils and contamination. The surface must be completely clean and dry before the new badge is applied — any residue weakens the bond and the badge will lift.
Allow the IPA to evaporate fully — 1–2 minutes.

The IPA step is the one most people skip, and it's the most important. We've seen badges start lifting within weeks because they were applied over a surface that looked clean but still had remover residue on it. IPA costs about £3 from a chemist and takes 30 seconds to apply. Don't skip it.
Fitting the New Badge
Dry-fit and confirm alignment
Before removing the adhesive backing, hold the new badge against the panel and check alignment carefully. On tailgate badges, check it's centred and level — stand back and look from a distance. Use masking tape to mark the position for model badges (320d, M340i, xDrive etc.) before the backing comes off.
A crooked tailgate badge is one of the most visible errors on a BMW. There are no second chances once the adhesive makes contact with a clean IPA surface.
Apply the new badge
Remove the adhesive backing, position carefully against your alignment marks, and press firmly for 30–60 seconds. Apply pressure across the full badge — edges and corners especially, not just the centre.
- The bond continues to strengthen for 24–48 hours
- Do not wash the car for at least 24 hours
- In cold weather (below 10°C), warm the surface first — cold adhesive tape bonds poorly
For tailgate model badges (320d, M340i, etc.), stick two strips of low-tack masking tape on the panel to mark the exact position of the bottom edge while the original badge is still in place. Remove the old badge, clean the surface, then use those tape marks as your reference line for the new one. Peel the tape off after pressing. Consistent, level results every time.
Common Mistakes — and What Happens
| Mistake | What it causes | How to avoid it |
|---|---|---|
| Using a metal tool to pry the badge | Scratches and gouges in the lacquer — often permanent without a respray | Fishing line only. If it won't shift, add more heat. |
| Skipping the heat step | The tape pulls rather than cuts cleanly — can lift paint, always leaves more residue | 30–45 seconds minimum. Re-heat whenever resistance increases. |
| Skipping IPA before the new badge | Badge starts lifting within weeks as adhesive fails against contaminated surface | IPA wipe is non-negotiable. Allow it to fully evaporate before bonding. |
| Not dry-fitting before bonding | Crooked badge — no safe way to remove without starting over | Always test position with the backing still on. Mark with masking tape. |
| Washing the car within 24 hours | Adhesive bond weakens before it cures — badge lifts at the edges | 24 hours minimum. 48 hours in cold weather. |
| Scrubbing adhesive residue with a dry cloth | Micro-scratches in the lacquer | Always use remover with dwell time first, then wipe gently. |
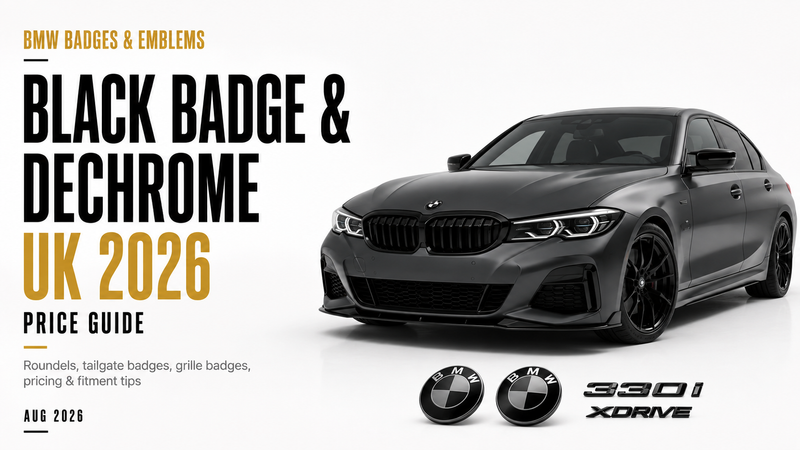
KITS UK BMW Gloss Black Badges
All verified from the live kits.style website, July 2026. All finished in high-quality gloss black with pre-applied 3M adhesive backing — not vinyl wraps, not painted chrome.

BMW F & G Series Gloss Black Tailgate Badge
£15.00
✅ In stock — Select your model at checkout (320d, 330d, M340i, M440i and more)
Shop Now →
BMW XDrive Gloss Black Replacement Badge
£15.00
⏳ Pre-Order — 6–8 Week Lead TimeNote: slightly smaller than OEM xDrive badge — aftermarket, not OEM. Compatible with all F & G Series.
Shop Now →
BMW F & G Series Gloss Black Side Wing Badges — M Sport (Pair)
£15.00
✅ In stock — Available in Gloss Black and Matte Black. M Sport models only.
Shop Now →
BMW F Series M Style Mirror Caps — Gloss Black
£59.00
✅ In stock — Clips over factory housing. F Series (F20, F30, F32 etc.)
Shop Now →
BMW G Series M Style Mirror Caps — Gloss Black
£59.00
✅ In stock — G20, G21, G22, G23, G26 compatible
Shop Now →Frequently Asked Questions
Will removing a BMW badge damage the paint?
Not if you heat the adhesive first and use fishing line. The most common causes of paint damage are skipping the heat step and using metal tools to pry the badge off.
How do I remove BMW badge adhesive without damaging the paint?
Apply automotive adhesive remover, allow 60 seconds dwell time, then wipe with a microfibre cloth. Follow with isopropyl alcohol. Never scrub dry and never use petrol, white spirit or abrasive products on painted surfaces.
How long does the whole job take?
Approximately 20–30 minutes per badge with the right tools. The adhesive removal dwell time can't be rushed — plan for the full 30 minutes rather than trying to cut it short.
How long before I can wash the car?
At least 24 hours. In cold weather (below 10°C), allow 48 hours. Pressure washing before the adhesive cures causes the badge to lift at the edges.
Is the XDrive badge exactly the same size as the factory one?
No — the KITS UK XDrive replacement badge is slightly smaller than the OEM xDrive badge. This is noted on the product page — check it's suitable for your preference before ordering. Also note it's currently on a 6–8 week pre-order lead time.
Can KITS UK fit new badges at the workshop?
Yes — select "Fitting: Included" on the product page or request a fitting quote. Fitting is available at Unit 3C Onward Park, Featherstone, West Yorkshire WF7 6EP — Tuesday–Friday 9am–5pm, Saturday 9am–4pm.
Related Guides
Badge replacement is the upgrade you can do this weekend for £15. The technique works every time when you follow the steps — heat, fishing line, remover, IPA, align, press. Where it goes wrong is always the same places: no heat, wrong tools, rushed surface prep. Get those three things right and the result looks factory.